Follow Me on Instagram

Instagram

Follow Me on Pinterest

don't miss dairy

Emily Stokes
I'm a lady who loves cheese, sour cream, & ice cream, but I recently became lactose intolerant. My key focus in recreating dairy recipes is taste, but I try to be as health conscious as possible. Some of my recipes are low lactose rather than dairy free. I'm also a writer, teacher, nanny, dog mom, housewife, native Yinzer, current Californian, and social organizer extraordinaire.

Snacks & Dips

Dairy-Free Loaded Potato Skins

Dairy_Free Loaded Potato Skins from dontmissdairy.com

It’s game time. Whether you’re excited for the Superbowl or the Oscar’s, make these for your next party!

We were in Seattle last year in time for the big Seahawks vs. 49ers showdown. The atmosphere was tense and exciting, and it seemed like everyone in Seattle was a fan–which explains the 12th man. It was so different from the Bay Area’s reaction to football that I became a Seahawks fan in less than a week. 

Now, I’m not saying I’d root for Seattle over the Pittsburgh Steelers or anything, but when it comes down to it, I’ll be tense in those final moments, hoping for that miraculous touchdown or field goal to carry the Seahawks into victory. 

But mostly, I’ll be watching sappy Budweiser commercials and eating these loaded cheesy potato skins.
Dairy-Free Loaded Potato Skins from dontmissdairy.com

Dairy-Free Loaded Potato Skins from dontmissdairy.com

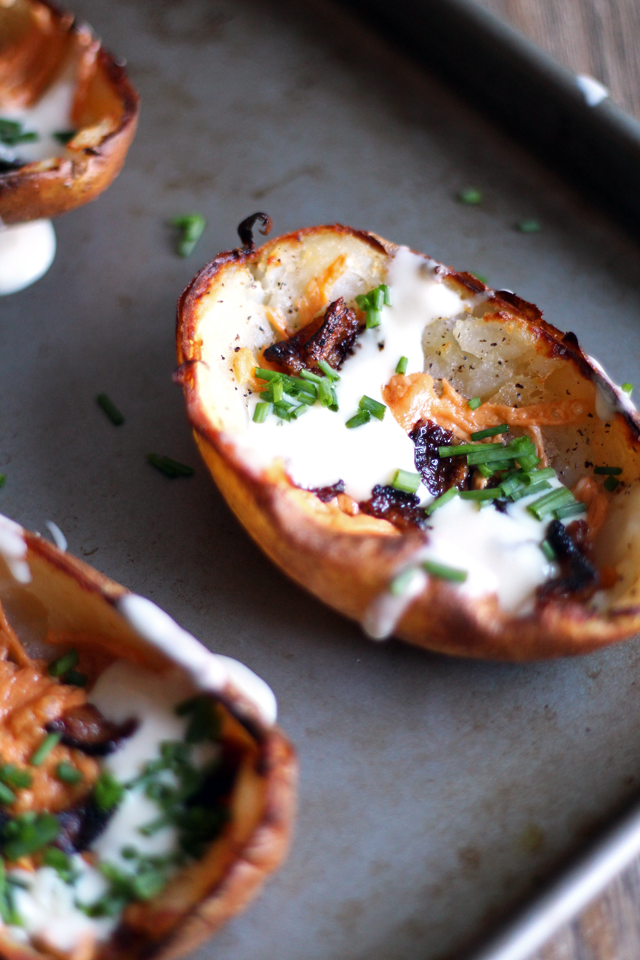
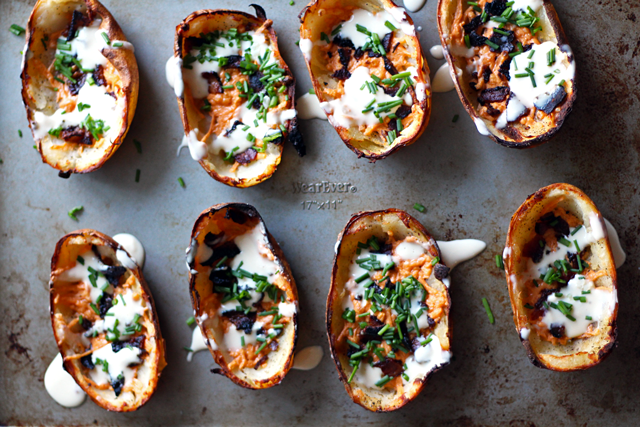
Crispy, buttery, cheesy, bacon-y, these pair perfectly with an ice cold beer on game day.

Even your dairy-loving friends will find these delicious! Just make sure to use a tried and trusted vegan cheese that you know performs well. I used Daiya, but I would also recommend soy cheese–it tastes the most authentic. I choose sweetened almond milk because it tastes closest to real milk, but feel free to experiment with other non-dairy milks and see what you come up with. Enjoy!

Dairy-Free Loaded Potato Skins from dontmissdairy.com

Dairy-Free Loaded Potato Skins
Serves 8
Write a review
Print
Ingredients
  1. 8 russet potatoes, scrubbed and dried
  2. 2 tablespoons vegan butter*
  3. Sea salt
  4. Black pepper
  5. 2 cups shredded vegan cheddar cheese**
  6. 6 slices bacon, cooked and crumbled
  7. fresh chives, chopped
White Cheese Sauce
  1. 1/2 cup vegan mozzarella cheese**
  2. 1/2 cup sweetened almond milk***
Instructions
  1. Heat oven to 400 degrees Fahrenheit.
  2. Pierce each potato on each side with a fork. Place the potatoes directly on the oven rack and bake for 50 minutes, until the skins are crisp and the potatoes tender enough to cut. Transfer to a wire rack until cool enough to handle. Meanwhile make your cheese sauce and set aside.
  3. Set oven to broil on high.
  4. Slice each potato in half lengthwise. Using a spoon, scoop out the flesh, leaving about 1/4 inch intact. Brush the insides of the potatoes with melted vegan butter and sprinkle with salt and pepper. Flip the potatoes over, brush the skin sides with butter, and sprinkle with salt and pepper.
  5. Evenly space the potato halves skin-side up on a baking sheet and broil until the skins start to crisp, about 2 to 3 minutes (keep a close watch so they don’t burn). Flip the potato halves over and broil until the top edges just start to brown, about 2 to 3 minutes more.
  6. Evenly fill each skin with vegan cheese and crumbled bacon. Place in the broiler and broil until the cheese is melted and bubbling, about 4 to 5 minutes.
  7. Remove from the broiler and drizzle with white cheese sauce then sprinkle with chives. Serve immediately.
White Cheese Sauce
  1. In a small saucepan over medium heat, bring almond milk to a simmer.
  2. Add vegan mozzarella and whisk until smooth and thickened. Remove from heat.
Notes
  1. *I used Earth Balance Buttery Spread.
  2. **I used Daiya Cheddar Style Shreds for the filling and Daiya Mozzarella Style Shreds for the cheese sauce.
  3. ***I used Almond Dream Original Almond Milk.
Adapted from Easy Potato Skins
don't miss dairy https://dontmissdairy.com/
 Dairy-Free Loaded Potato Skins from dontmissdairy.comDairy-Free Loaded Potato Skins from dontmissdairy.com

Blueberry Cashew “Cream Cheese”

Blueberry Cashew Cream Cheese from dontmissdairy.com
Last month I had the pleasure of trying a delicious cashew cream parfait made by a friend on a weekend getaway to Santa Barbara. It was light-tasting, creamy, and delicious. I must say, I was reluctant to embark on the cashew cream experience, but it does open up a new world of dairy-free possibilities. 

One drawback to cashew recipes is prep time. Depending on what you make, it can take days to complete. Cashews usually require soaking, a high powered blender, and patience, and this blueberry cream cheese recipe is no exception. I do have a few options, though, for those who like to take the faster route.

Either way, the result is this: a soft and sweet cashew spread in a delectable shade of purple, perfect for topping bagels or even spreading on cakes. 

Blueberry Cashew Cream Cheese from dontmissdairy.com

For a firm cream cheese, like you would normally buy in a block at the grocery store, you have a few options. The simplest is straining the cream cheese after processing in a cheesecloth overnight.

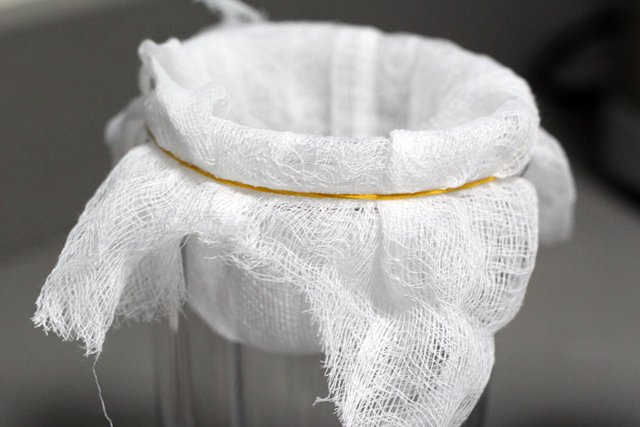
Do this before adding any extra flavors to the cream cheese but after you add the salt, lemon juice, and vinegar. I do this by fitting the cheese cloth over a bowl, large cup, or pitcher with a rubber band and setting the cream cheese on top.

Blueberry Cashew Cream Cheese from dontmissdairy.com

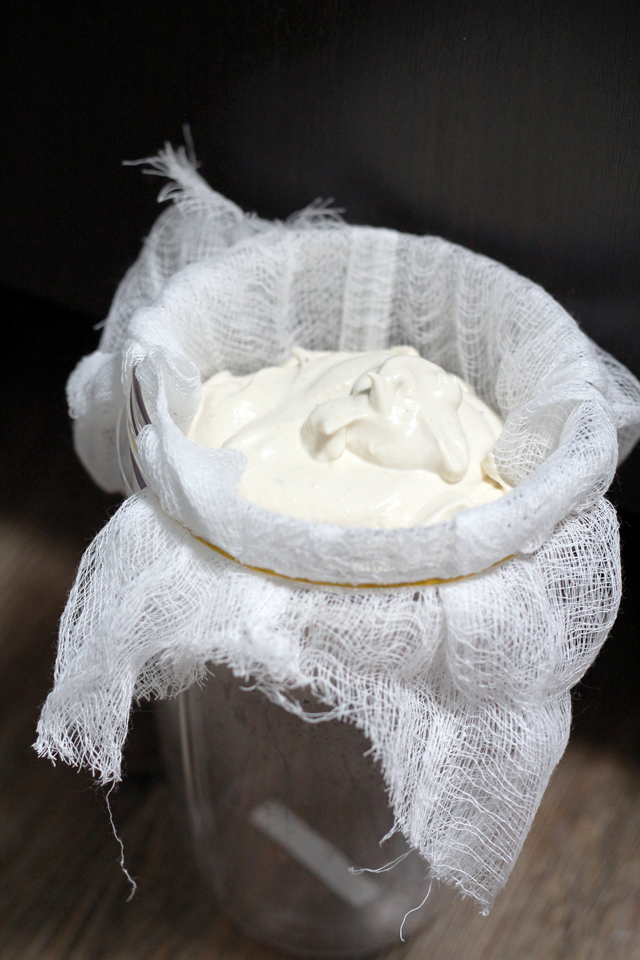
Plain cashew cream before straining.

Blueberry Cashew Cream Cheese from dontmissdairy.com

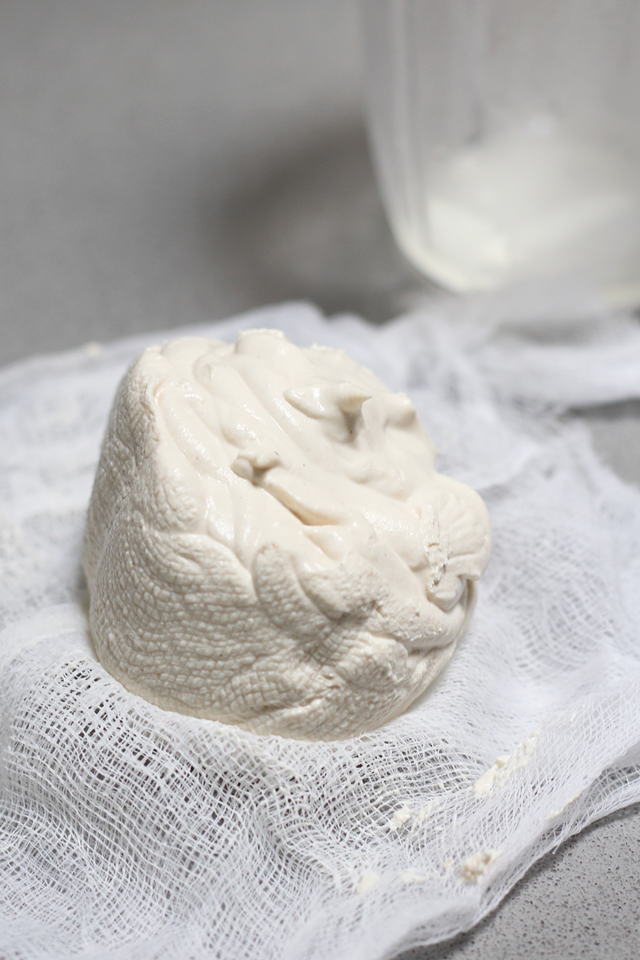
For a firmer cream cheese, strain using a cheesecloth positioned with a rubber band over a tall cup like this.

Make sure to cover the exposed cashew cream with plastic wrap to avoid it drying out. You can leave on the countertop or in the refrigerator overnight or up to 24 hours. Extra liquid will drip to the bottom of the bowl, leaving you with a firm, shapeable cream cheese base. There’s so much you can do with this, like adding different flavors or even shaping into a cheese ball.

Blueberry Cashew Cream Cheese from dontmissdairy.com

Set the cashew cream into the cheesecloth and cover with plastic wrap. Allow liquid to drip overnight or up to 24 hours. I put mine in the fridge.

Blueberry Cashew Cream Cheese from dontmissdairy.com

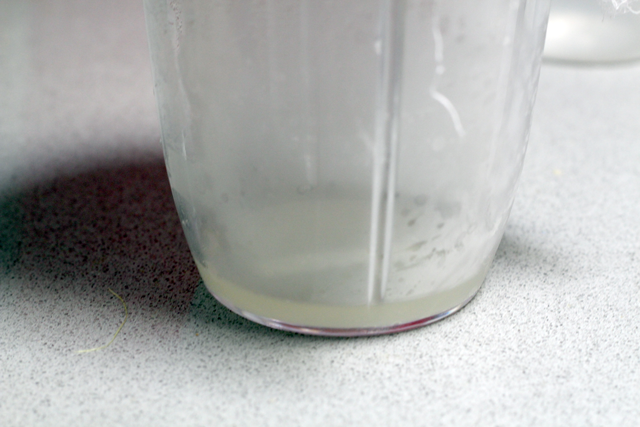
This one I let drip for about 16 hours. The liquid will collect at the bottom.

Blueberry Cashew Cream Cheese from dontmissdairy.com

Finished cashew cream cheese, ready to be eaten, mixed with seasonings, or shaped into a cheese ball.

A faster option for a firmer cream cheese is to add 1 tablespoon of melted coconut oil or a thickener such as tapioca flour or xanathan gum (found in your local Whole Foods store) to your cashew cream, along with your flavor additives, then refrigerate. This will affect the taste, however.

The easiest option is to skip the thickening, which will result in a soft and fluffy cream cheese. It will have more of a whipped cream consistency–still thick enough  to spread on a bagel yet thin enough to spread on a crumbly biscuit or muffin. The softer version of the cream cheese is pictured. Make it your own and enjoy! 

If you do, share it on Instagram with #dontmissdairy. I’d love to see your version! Sharing dairy free recipes is so inspiring to others with lactose intolerance!

Blueberry Cashew "Cream Cheese"
Write a review
Print
Ingredients
  1. 1 cup raw cashews, soaked in water overnight
  2. fresh lemon juice from 1 lemon
  3. 2 teaspoons apple cider vinegar*
  4. 1/4 teaspoon sea salt
  5. 1/4 cup water
  6. 1 cup frozen blueberries
  7. 2 tablespoons white sugar
Instructions
  1. To soak cashews, place in a medium bowl and add water until just covered. Allow to sit overnight, or at least 8 hours. Strain the liquid and rinse the cashews well.
  2. In a high powered blender, add soaked cashews, lemon juice, apple cider vinegar, sea salt, and water. Blend until you achieve a smooth consistency, scraping the sides to incorporate. If necessary you can add more water 1 tablespoon at a time, but this will thin your final product. For a firmer cream cheese, strain in a cheesecloth overnight. For a faster, softer cream cheese, move on to the next step.
  3. In a small saucepan, simmer frozen blueberries and white sugar over low heat for about 10 minutes. Liquid should be so much reduced it is almost all evaporated. Remove from heat.
  4. In a medium bowl, mix cashew cream cheese and blueberry reduction until combined. Add a quick thickener if desired, such as melted coconut oil.** You can also add more sugar to taste. Refrigerate for at least four hours to cool and firm. Store in the refrigerator for up to a week.
Notes
  1. *Optional (Gives it that tangy cream cheese flavor. If you don't like the slight taste of apple cider vinegar, you can omit)
  2. **Blend with 1 tablespoon coconut oil for a quick firmer cream cheese option.
don't miss dairy https://dontmissdairy.com/
Blueberry Cashew Cream Cheese from dontmissdairy.com

Mom’s Salsa

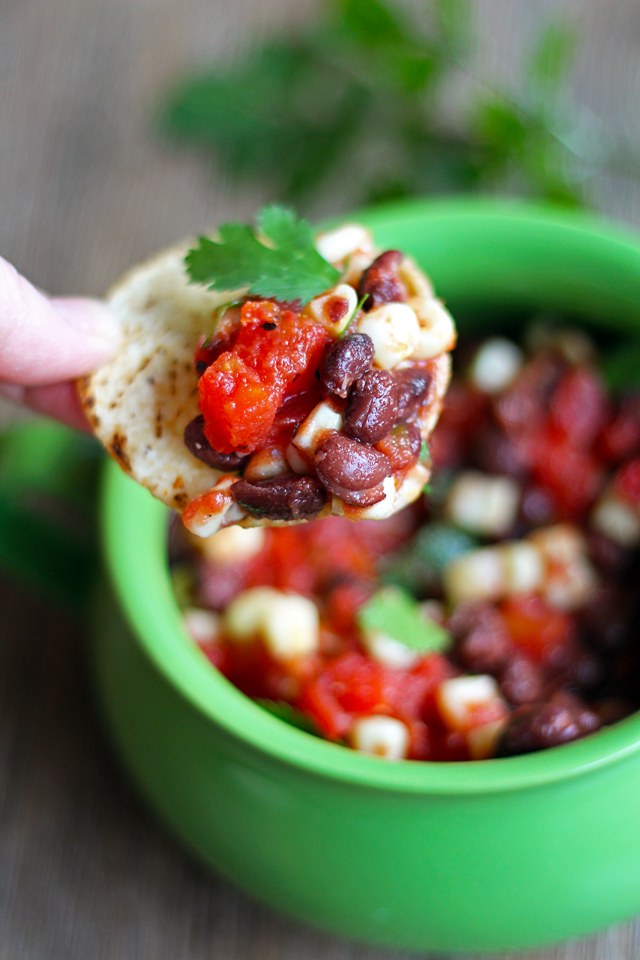
Mom's Salsa from dontmissdairy.comI was on the phone with my mom while shopping for Super Bowl snacks at Trader Joe’s, and she mentioned this salsa recipe she had made up.
It’s no mystery where I get my recipe experimenting skills from. 😉

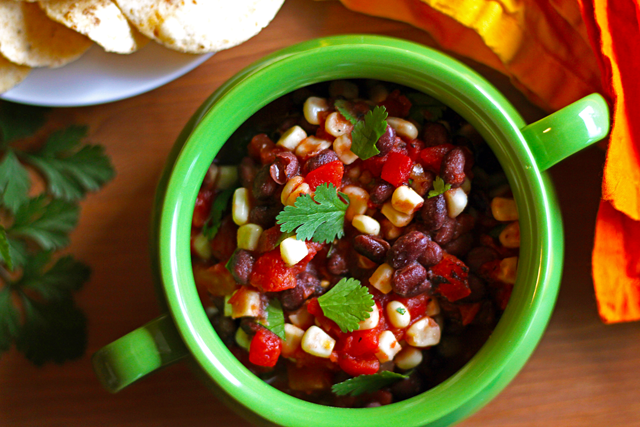
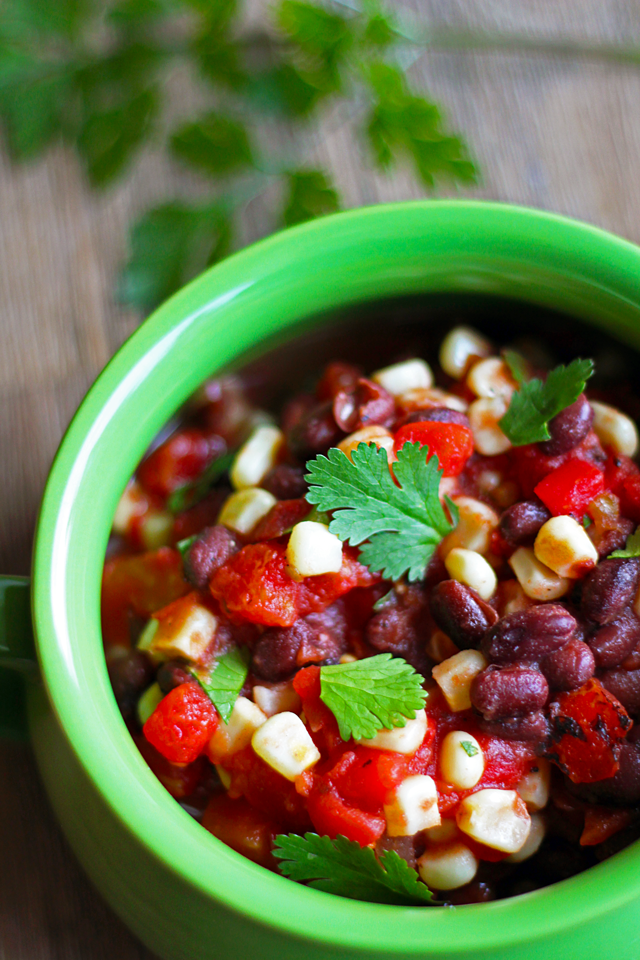
She had me looking for fire-roasted diced tomatoes with chiles and frozen sweet white corn. She said I could use Ro*Tel, but she liked the Trader Joe’s brand.

I was surprised at how it came together since it’s so simple. And after my husband and I ate the whole batch as the Seahawks won the Super Bowl I thought, what an awesome dairy free recipe for a blog post. I then asked her for her permission to publish it, which she granted, as long as I named it after her.

Mom's Salsa from dontmissdairy.com

I was talking to my mom, Donna, on the phone instead of shopping with her because she lives in Pittsburgh, PA, which is about a billion miles away from California.

Since my family is so far away, I miss my mom a lot. Thank goodness for cell phones, unlimited minutes, and Google Hangouts.

I’m missing my mom even more today, because she just came to visit me in California. I don’t know what she wanted more, to see her daughter, to escape Pittsburgh’s endless snowfalls, or to have a vacation. 

Though California needs the rain desperately, I was glad to have some warm, beautiful days for her visit. She needs a reason to come back, right?

She escaped the cold, snowy east coast for a week and got to experience blossoms, birds, and citrus trees, walks without a jacket, and sunning on the patio…in the middle of February.

We went shopping, ate vegan ice cream, and went wine tasting. We had a great time and she spoiled my puppy. The only thing I regret is not getting a good picture together during the whole trip. We had every intention of setting up the tripod and getting pictures at the ocean, but when we got to the coast the weather was overcast, windy, and freezing. Bummer.

The week went too fast and now it is too quiet in my apartment. So I am thinking of her as I type up her recipe.

It’s super simple and easy by the way. There’s no chopping required (yay!) and it’s fast to throw together. It’s also free of gluten and dairy.

Don’t leave anything out. You’ll be glad you made a trip to the store for fresh limes and cilantro. Yummy!

Mom's Salsa from dontmissdairy.com

Mom's Salsa
Write a review
Print
Ingredients
  1. 1 can organic fire roasted diced tomatoes with green chiles
  2. 1 cup sweet white corn, defrosted if frozen and drained of any liquid
  3. 1 cup black beans, rinsed and drained
  4. Juice of 1/2 lime
  5. 4 sprigs fresh cilantro leaves, torn or chopped
  6. 1/8 teaspoon sea salt
Instructions
  1. Combine tomatoes, sweet white corn, and black beans together in a medium size bowl with a lid.
  2. Add juice of half a lime, sea salt, and chopped or torn cilantro leaves. Mix together, then cover and refrigerate for 1 hour. Serve with salted tortilla chips.
Notes
  1. Try with chopped avocado!
don't miss dairy https://dontmissdairy.com/

Mom's Salsa from dontmissdairy.com