How do you make the tastiest, tenderest turkey with the least amount of work involved? Forget brining and basting, just cook it in a Reynolds Oven Bag. This is the not-so-secret method of my grandma’s turkey cooking, passed down to me on my first Thanksgiving as a married woman. I love simple turkeys best–they don’t taste like salt and flavorings, they taste like real, tender, moist, delicious turkey. Make a simple thick gravy from the drippings and pour it over everything. There is nothing quite like it. Here are a mix of tips my grandmother gave me, and also some from Reynolds, when making a turkey in an oven bag.
Tools you will need:
Reynold’s Oven Bag, Turkey Size
Large baking pan–we get the disposable pans.
A turkey thermometer if your turkey doesn’t come with one
If you are stuffing it, get some some string to tie the legs together, and a wire skewer for the neck
Ingredients:
Frozen turkey, any size
Olive oil or canola oil
Sea salt and black pepper
1 yellow onion
3 celery stalks
1 tablespoon of flour
Your favorite stuffing
*Optional: Paprika
Directions:
1. Thaw your turkey according to directions on packaging. Ours was 23 lbs. and needed three days to thaw in the refrigerator. It was still frozen in the inside when we opened it, so we rinsed this part under warm water. We were cooking for a huge group, not just the two of us!
2. Preheat oven to 350 degrees Fahrenheit and then clean out the turkey. Take out the parts inside the neck and chest cavity–reach in and pull out everything that shouldn’t be there. Rinse it well, like giving it a bath. Take off the oil gland if it’s still on the tail–ours was. Place your cleaned turkey on a cutting board or clean surface and pat the skin dry with paper towels.
3. You can take this time to prepare your favorite stuffing if you haven’t already. Follow the poultry preparations on the stuffing bag or box. My favorite is a whole grain cranberry stuffing in a bag I get at Whole Foods. We made two batches, including fresh diced onions and celery as it called for in the poultry directions.
4. Now you can prepare the oven bag. Open it up and add a tablespoon of flour. Close the opening and shake it around. This will coat the bag and prevent it from sticking to the turkey and bursting. Slice a yellow onion and your celery stalks and add them to the bag–your turkey will sit on top of them.
5. Rub the turkey in your choice of oil. We once used a mixture of butter and olive oil, but we don’t use butter around here anymore. It turned out great, though. This year we used canola oil and it still turned out fantastic. After the turkey is covered, lightly sprinkle sea salt and black pepper over every inch of it. If you want a browner turkey, sprinkle paprika over it.
6. Put the stuffing in the chest cavity and neck, then close the neck so the stuffing doesn’t fall out when you move the bird.
7. Place the turkey in the Reynold’s bag on top of the vegetables. The tricky part is which side do you place it on? Traditionally, you would put it on it’s back, for a pretty, brown turkey. But for flavor, my grandma recommends putting it breast side down. She says this makes the moistest turkey. So that’s what we did. Make sure you tie it securely with the provided nylon tie.
8. Cut six half inch slits on top of the bag, and insert your turkey thermometer through one of these slits, into the thickest part of the inner thigh, not touching the bone. Tuck in the ends of your bag so they don’t burn in the oven.
9. Now comes one of the best parts about the oven bag–the baking time. Using this method reduces the baking time, so it’s really convenient, especially if you have a very large turkey like we did. Bake 2 to 2 1/2 hours for a 12 to 16 lb. turkey, 2 1/2 to 3 hours for a 16 to 20 lb. turkey, and 3 to 3 1/2 hours for a 20 to 24 lb. turkey. Add 1/2 hour for a stuffed turkey. When it’s done the red thermometer will pop up. We cooked ours for a little over four hours, but without the bag it could have taken six hours.
10. Take your turkey out and let it sit for 15 minutes before loosening the bag. If you are making gravy–this method produces an insane amount of tasty turkey drippings. It will be flavored by the onion and celery, salt and pepper. We cut a corner of the bag and drain it into a pot, straining any stray onion slices and stuffing. Read on to make your gravy. Happy Turkey Day!
Making the Gravy
Ingredients:
Turkey drippings
Cornstarch
Directions:
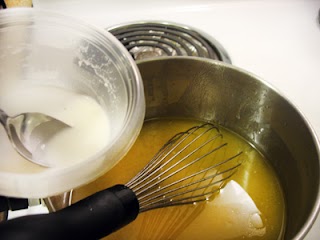
1. Dissolve 1 tablespoon of cornstarch in 1 tablespoon of water and set aside.

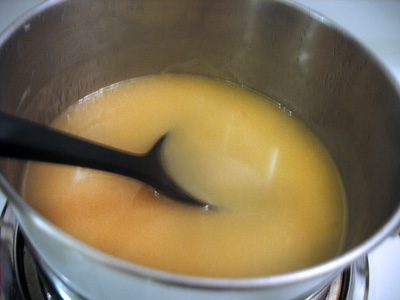
2. Stir into turkey broth with a wire whisk, and heat on medium high. Bring to a boil and stir constantly. If the gravy is not thick enough, or if you have tons of gravy like we did, add another tablespoon of cornstarch and water mixture until desired thickness. Pour over turkey and mashed potatoes. Mmmm.


